Tallow Candles: How to Make Homemade Scented Candles
Tallow candles are such a satisfying project to tackle at home. They’ve been around for ages, made from simple, natural ingredients—just rendered animal fat and a few basics. What makes them special is their versatility. You can keep them plain and practical or turn them into something decorative and personal with scents and touches of color.
This guide isn’t about overwhelming you with complicated steps. It’s straightforward, covering everything from picking the right container to handling hot tallow safely. You’ll also find tips for troubleshooting common issues like uneven burning and how to make your candles last longer.
What You’ll Need
The foundation of your candles starts with two simple ingredients: tallow and wicks.
- Rendered Tallow
For candle-making, beef and lamb fat are the most commonly used sources of tallow. They’re easy to render, have a firm texture at room temperature, and produce smooth, clean-burning candles. While it’s possible to render fat from other animals, such as deer or pork, these are less ideal for candle-making. Pork fat, also known as lard, has a softer consistency and a lower melting point, which can result in candles that are less stable and more prone to deforming in warmer temperatures. Additionally, beef and lamb tallow tend to have a more neutral scent, making them better suited for both unscented and scented candles. - Wicks
Choosing the right wick is just as important as selecting your tallow. Cotton or hemp wicks are excellent sustainable options. The size of the wick matters too—it should match the diameter of your container to ensure an even burn and prevent issues like excessive smoking or tunneling. Don’t worry, I’ll explain more about wick sizing later in the guide.
Optional Add-Ons
Tallow candles can be personalized in so many ways! Here are a few ideas to make your candles extra special:
- Essential Oils for Scent
Adding a few drops of essential oil is an easy way to customize the fragrance of your candles. Choose oils that suit the season or your mood—lavender for relaxation, peppermint for a fresh burst, or cinnamon for cozy winter vibes. - Dried Herbs, Flowers, or Natural Colorants
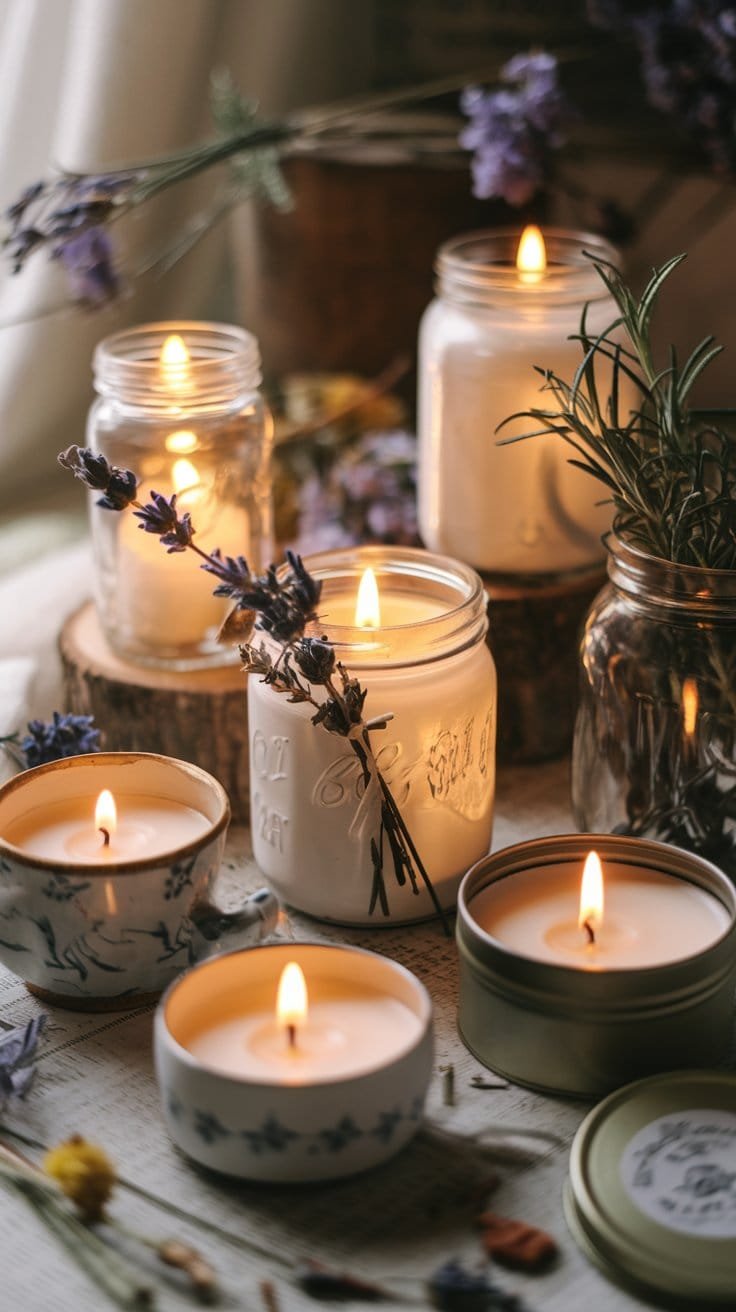
For a decorative touch, sprinkle dried herbs or flowers on top of your candles before they set. Lavender, rose petals, and rosemary not only add beauty but also provide a light, natural fragrance. You can also use natural colorants like turmeric for a golden hue or spirulina for a soft green tint.
Tools
You don’t need many specialized tools to make tallow candles, but a few key items will make the process easier:
- Double Boiler or Heat-Safe Container
A double boiler is ideal for melting tallow as it helps regulate the temperature and prevents scorching. If you don’t have a double boiler, a heat-safe container over a pot of water will do the trick. - Thermometer
It’s helpful to have a thermometer to monitor the temperature of the tallow, especially when adding essential oils. You want the tallow to cool slightly before adding oils, as high temperatures can burn off their fragrance. - Wick Holders or Chopsticks
Wick holders or chopsticks can help keep your wicks centered while you pour the tallow. This ensures that the wick remains straight, allowing the candle to burn evenly.

Step 1: Preparing the Tallow
The foundation of any great tallow candle begins with properly rendered and purified tallow. You’ll want to make sure the tallow is clean and free of impurities to ensure your candle burns evenly and doesn’t produce an unpleasant scent. If you’re new to rendering tallow or looking for different methods, check out 4 Easy and Effective Ways to Render Beef Tallow for a variety of techniques.
Tips for Success:
- Strain the Tallow
After rendering, strain the tallow through cheesecloth or a fine mesh strainer to remove any remaining debris or impurities. These can interfere with the burn and scent of the candle, so taking this extra step ensures a cleaner, smoother result. - Heat Slowly
When rendering tallow or melting it for your candles, always heat it slowly. This helps prevent scorching, which can affect the quality of the tallow and the overall performance of your candle. Low and slow is the key to getting the best results.
Do You Need to Use Wax?
When You Don’t Need Wax:
For container candles, pure tallow works perfectly on its own. The container provides enough support to hold the tallow in place as it sets, so there’s no need for additional wax. This keeps the candle as natural as possible, and you still get a clean, even burn.
When to Add Wax:
If you’re making free-standing candles, such as pillars or tapers, adding a small amount of beeswax (10–20%) can help enhance the structure and durability. Beeswax also helps reduce the chances of dripping, which can be a common issue with pure tallow candles.
Blending Tips:
When mixing tallow and wax, simply heat them together to a temperature of 130–140°F. This will ensure both the tallow and beeswax melt evenly and blend smoothly. The key is to mix them well once they reach that temperature to ensure a uniform consistency. You can experiment with different ratios of tallow to wax to get the desired burn characteristics, such as a longer burn time or less dripping.

Container Safety: Choosing the Right Vessel
When selecting a container for your tallow candles, it’s essential to choose one that can safely withstand the heat of the melted tallow and the candle’s flame. Here are the best options to consider:
Containers That Work:
- Heat-Resistant Glass: Mason jars or other candle-specific glass containers are great choices. They’re durable, easy to find, and won’t absorb the oils from tallow, which helps maintain the quality of the burn.
- Metal Tins: Aluminum or coated metal tins are another good option. They conduct heat evenly, are lightweight, and won’t crack under the heat of the candle.
- Ceramic and Stoneware: Ceramic teacups, small bowls, or stoneware jars can add a rustic, decorative touch. Be sure to check that they are oven-safe and free of cracks to avoid any risk of breakage when the tallow heats up.
Containers to Avoid:
- Plastic: Plastic can melt or warp under the heat of the tallow, posing a fire hazard.
- Thin Glass: Thin or non-tempered glass may crack when exposed to high heat, which could cause the tallow to spill.
- Wood or Porous Materials: Wood and porous materials can absorb the tallow and potentially catch fire, so they should be avoided for candle-making.
Additional Tips:
Secure Wicks: Make sure your wick is securely fastened to the bottom of the container before pouring the tallow. You can use a dab of adhesive to hold it in place and ensure it stays centered while the candle sets.
Test for Heat Resistance: Before pouring hot tallow into your container, test it by filling it with hot water first. This will help ensure that the container can handle the heat without cracking or warping.
Wick Sizing and Buying Wick on a Roll
When you buy wicks for candle-making, they often come in different sizes to match the diameter of the container or the type of candle you’re making. Wick sizes are usually numbered, and a larger number means a bigger wick, suitable for larger containers or candles that need more heat to burn evenly. For example, a small container might use a size 2 wick, while a larger container might need a size 6 wick.
How to Choose the Right Wick Size:
- Small Containers (1–3 inches in diameter): Use a smaller wick, like size 2 or 3.
- Medium Containers (3–4 inches in diameter): A medium wick, such as size 4 or 5, works best.
- Large Containers (4+ inches in diameter): Use a larger wick, like size 6 or 7, to ensure the candle burns evenly across the surface.
Why Wick Size Matters:
- Too Small of a Wick: If the wick is too small, it won’t burn the tallow evenly, and your candle may tunnel (burn only in the center).
- Too Large of a Wick: A wick that’s too large can burn too hot, creating excessive smoke or causing the candle to burn too quickly.
If you’re unsure about which wick size to choose, start with a medium-sized wick and test it out. You can always adjust if the burn isn’t perfect.
Buying Wick on a Roll
Yes, you can buy wick on a roll! This is a great option if you plan on making several candles or need a custom wick length. Buying wick on a roll allows you to cut it to the desired length for each candle.
How to Use Wick from a Roll:
- Cut the Wick: Measure the height of your container and cut the wick so it’s about 1–2 inches taller than the container.
- Secure the Wick: Attach the wick to the bottom of your container using a wick holder or adhesive. This ensures the wick stays centered while you pour the melted tallow.
- Trim the Wick: After the tallow sets, trim the wick to about 1/4 inch above the surface for the best burn.
Wick rolls are flexible and perfect for customizing the wick length for various projects. Just make sure to choose the right wick size based on your container’s diameter and desired burn quality.
Adding Essential Oils
Essential oils are a fantastic way to customize your tallow candles with delightful scents that suit any season or mood. When used correctly, essential oils can enhance the ambiance of your candles, making them more enjoyable to burn.
When to Add Essential Oils
The best time to add essential oils is after the tallow has been fully melted but has started to cool slightly. Aim to add them when the tallow is around 120–130°F (49–54°C). If the tallow is too hot, the delicate fragrance molecules in the oils can evaporate, causing the scent to fade or be less noticeable once the candle is burned.
How Much Essential Oil to Use
A general rule of thumb is to add 5–10 drops of essential oil per cup of melted tallow. This will give your candle a light, pleasant fragrance. You can adjust the amount based on how strong you want the scent. If you prefer a stronger scent, feel free to add a few more drops, but avoid overdoing it, as too much oil can affect the candle’s burning quality.
Types of Essential Oils to Use
You can use a variety of essential oils depending on the atmosphere you want to create. Popular choices include:
- Lavender for a calming, soothing fragrance.
- Peppermint for an uplifting, energizing scent.
- Cinnamon or clove for a warm, cozy fragrance.
- Citrus oils like lemon, orange, or grapefruit for a fresh, light scent.
- Rosemary or eucalyptus for a refreshing, herbal fragrance.
Tips for Success
- Mix Well: After adding the essential oils, stir the tallow thoroughly to ensure an even distribution of fragrance.
- Test the Scent: If you’re unsure about the strength of the scent, you can always test it by letting a small amount of tallow set and burning it to see how the fragrance comes through.
- Avoid Overheating: Keep the temperature below 140°F (60°C) to preserve the fragrance. The tallow will still be warm enough to pour, but the oils will retain their full aroma.
Adding essential oils is a great way to make your tallow candles unique and tailored to your preferences. Feel free to experiment with different oils and blends to create the perfect candle scent!

Safety Notes for Candle-Making
Candle-making involves working with hot tallow, so it’s important to follow safety guidelines to avoid accidents and ensure your candles burn safely.
- Always Work in a Well-Ventilated Area
Melting tallow can release fumes, so be sure to have good airflow in your workspace. Open a window or use a fan to keep the area well-ventilated. - Keep Melted Tallow Away from Water
Tallow can splatter when it comes into contact with water, which is dangerous. Make sure all your tools and containers are dry before use. - Secure Wicks with Adhesive
To keep your wick centered during the pouring process, use a small dab of adhesive at the bottom of the container. This will help prevent it from shifting and ensure an even burn. - Handling Hot Tallow
Always use gloves and pour tallow slowly to avoid burns or splattering. Keep a damp cloth nearby to clean up any spills right away. - Test for Safe Burning
Ensure the wick size matches the container’s diameter to prevent excessive flames or uneven burning. Adjust wick size or trim as necessary. - Monitor for Tunneling or Dripping
Watch your candle as it burns to make sure it’s not tunneling (burning down the center) or dripping too much. If needed, adjust the wick size or trim it to maintain an even burn. - Storage Tips
To prevent your candles from melting or becoming rancid, store them in a cool, dry place. Wrapping them in parchment paper or storing them in airtight containers can also help keep them fresh longer.
Troubleshooting Common Issues
Even with the best materials and preparation, there are a few bumps that can come up during candle-making. Here are some common problems and how to fix them:
- Uneven Burning
If your candle burns unevenly, it’s often due to the wick size being too small for the container. To prevent this, always choose a wick that matches the diameter of your container. Additionally, trim the wick to about 1/4 inch before lighting to ensure a clean, even burn. - Weak Scents
If your candle doesn’t have a strong fragrance, it may be due to adding the essential oils when the tallow was too hot. Make sure to add essential oils at 120–130°F (49–54°C) to preserve the fragrance. If the scent still doesn’t come through, try adding a little more essential oil or experimenting with different types of oils. - Cracking in Wax
Sometimes, your candle may develop cracks on the surface as it cools. To avoid this, pour the tallow slowly and allow it to cool gradually. Pouring too quickly or letting it cool too fast can cause the surface to crack. You can also warm the containers slightly before pouring to help the tallow cool more evenly. - Candle Tunneling
Tunneling happens when the candle burns only down the center, leaving a ring of unused tallow around the edges. This usually occurs if the wick is too small or the candle is burned for too short a time. Use the appropriate wick size for your container and make sure to burn the candle long enough (2–3 hours) for the melted tallow to reach the edge. - Excessive Smoking
If your candle produces too much smoke, it could be because the wick is too large or too long. Trim the wick to 1/4 inch before lighting and make sure the flame isn’t too large. If the flame flickers excessively, try using a smaller wick size. - Uneven Tallow Surface
If the tallow settles unevenly, it could be because the pouring temperature was too high or the container was disturbed before it had time to set properly. To fix this, allow the tallow to cool slightly before pouring, and ensure the container stays stable as the tallow sets. - Candle Won’t Burn Properly (Low Flame or No Flame)
A weak or non-existent flame could mean the wick is too small, the tallow isn’t melting correctly, or there’s too much fragrance oil. Check the wick size to ensure it’s appropriate for your container, and trim it if needed. Also, avoid overloading the candle with fragrance oil, as too much can prevent the wick from burning properly.
Creative Ideas for Personalizing Tallow Candles
Making tallow candles your own is a fun way to add a personal touch. Here are some creative ideas to get you started:
- Layered Candles
One way to make your candles stand out is by creating multi-colored or multi-scented layers. To do this, simply pour the tallow in stages, allowing each layer to set before adding the next. You can experiment with different essential oils for each layer, creating a beautiful and aromatic experience.

- Seasonal Themes
Customize your candles for the seasons by using essential oils that reflect the time of year. For example, use peppermint or pine essential oils for a cozy, winter vibe, or citrus oils like lemon or orange for a refreshing, summery scent. You can also add seasonal touches by incorporating dried herbs like cinnamon or cloves for a festive feel. - Decorative Finishes
Adding a decorative touch to the top of your candles is a simple way to make them unique. Sprinkle dried herbs, flowers, or even natural colorants (like turmeric or spirulina) on top before the tallow sets. These little touches not only make your candles visually appealing but can also add subtle hints of fragrance.
Benefits of Tallow Candles
Tallow candles offer several advantages over other types of candles, making them a great choice for those looking for a natural, sustainable option. Here are some key benefits:
- Eco-Friendly
Tallow is a byproduct of meat production, which means it’s a sustainable way to reduce waste. Unlike synthetic candles, tallow is biodegradable and free from harmful chemicals, making it a safer choice for both the environment and your home. - Cost-Effective
Tallow is inexpensive, especially when you render it yourself. Compared to store-bought candles, making your own tallow candles can save you a lot of money, all while providing you with a natural, high-quality product. - Long-Lasting and Clean Burning
Tallow candles burn longer and more evenly than many other types of candles, such as paraffin, making them a great value. They also produce minimal soot, which means less indoor air pollution and a cleaner burn. This makes tallow candles safer for indoor use, especially for those who are sensitive to the fumes from traditional candles.
What’s Next?
Coming soon, we’ll share even more creative tallow candle recipes perfect for any occasion! Stay tuned for guides to:
- Rustic Lavender & Rosemary Candles
- Warm Cinnamon-Orange Candles
- Uplifting Citrus-Mint Candles
- Cozy Vanilla Bean & Clove Candles
- Calming Eucalyptus & Peppermint Candles
- Festive Spiced Apple & Cinnamon Candles
- Tropical Coconut-Lime Candles
- Floral Rose & Geranium Candles
- Relaxing Chamomile & Lemon Candles
There’s no limit to the combinations you can create, so get ready to experiment with different scents, colors, and themes for your very own tallow candle creations!
Explore More: Coming Soon
Get ready for more detailed guides and inspiration! Stay tuned for upcoming posts on:
- How to Render and Purify Tallow for Candle-Making
- DIY Candle-Making Tools: Must-Haves for Beginners
- 3 Simple Ways to Add Color to Tallow Candles Naturally
- Creating Multi-Scented Layered Candles
- Best Wick Types for Natural Candles
- How to Make Your Tallow Candles Burn Longer
- Creative Ways to Package and Gift Tallow Candles
- How to Make Beeswax & Tallow Blended Candles
- Understanding Candle Safety and Best Practices
- Natural Alternatives to Fragrance Oils for Tallow Candles
There’s a lot more to explore, and we can’t wait to share it with you!
Pinterest-Optimized Ending
“Pin This Guide for Later!”
If you’re ready to start making your own tallow candles, save this guide to your Pinterest boards for easy reference. It’s the perfect resource to have on hand whenever you need candle-making inspiration!
